 |
| Kelli Sinner |
Thursday, October 30, 2014
Sneak peek final project option 2!
Tuesday, October 28, 2014
Shannon Sullivan next Tuesday!


Thursday, October 23, 2014
Tip Toland sculpting a bust
Beginning Students:
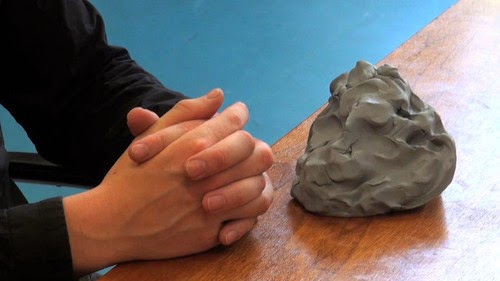
Remember while you are not hollowing out, you must release any trapped air with a pinhole. Leather hard is the best stage to carve details and while you want to keep your head from drying out do not over hydrate. If you see water on the surface or moisture building it's too wet and may weaken or collapse the form. A damp paper towel (wring out all water) or just wrapping in enough plastic usually works well. Remember to only use 04 Lowfire Slip and Engobe.
Get started on details and have fun!


Wednesday, October 22, 2014

Robert Arneson: Self Portraits


Monday, October 20, 2014
University of Texas Arlington art saturday
Free opportunity for students!
Email me if your interested and I'll send you the atatchment so you can read about workshops and demos. A great and free opportunity!
Email me if your interested and I'll send you the atatchment so you can read about workshops and demos. A great and free opportunity!
Due to limited space in many of our studios, you
must RSVP for all workshops to art@uta.edu.
Wednesday, October 15, 2014
Handbuilt Functional Bowls: Emily Schroeder Willis!

 | |
| Both bowls made from porcelain and fired to cone 6 in an oxidation electric kiln. Look at those detail. Love the subtle cutout on the foot. See more of her work here. |
Sunday, October 12, 2014


Thursday, October 9, 2014
Wednesday, October 8, 2014
gert germeraad
New artist to look up and new website! I'll add it to the side bar.


 New website for inspiration and research: Charlotta Klingström Keramik / Ceramics
For Adrianna
Clay
Leonard. This is his work titled, "Oval Bowl Set",
hand-built porcelain, cone 6, 14 x 8 x 7,”. See the rest of his work at http://artaxis.org/

 |
| Could be a nice start for your research conversation cups! |
 |
Par le céramiste Joe Christopherson. |

Tuesday, October 7, 2014
Project 2: 2 or more heads
Don't forget you must have 2 or MORE heads on your shoulders!


Proportions of the Human
Head
Traditional rules of proportion show the face divided into six
equal squares, two by three. The upper horizontal division is roughly at the
'third eye' level mid-forehead, the lower at the base of the nose. The eyes sit
on the horizontal centre, the mouth on the centre of the lower third.
This is an ideal which does not account for racial and individual
variation, observing these basic proportions gives you a starting point to
measure against.
• Size of
Head: The distance from the chin to the crown is the same as from the
back of the head to the front. Features take up only a small portion of the
head; a lot of space is needed for the brain! The mid-point of the face, when
measured from chin to crown, is at the base of the eyes or eye sockets.
• Eyes: The space
between the eyes is about the same width as one eye. If the width of eye is
used as a unit of measurement, the head is five eyes wide.
• Eyebrows extend
beyond the eyes on both sides.
• Ears: The top of
the ears line up with the brow of the nose and the eyebrows, and the bottom of
the ears with the tip of the nose.
• Nose: The bottom
of the nose is the midpoint between the eyes and the chin.
• Mouth: The corners
of the mouth align with the centre of the eyes (if you're not smiling). The
line where the two lips meet is slightly above the halfway point between the
end of the nose and the chin.
• Chin: The mound of
the chin starts at the inner corners of the eyes.
In honor of James Watral


 |
| See more of the Rosenfield Collection's Watral work |
TODAY OCT 7th!
1:30 pm in F219
Find out how to transfer with
scholarship to KCAI
Kansas City Art Institute offers degrees in art, design, art history and art
education from eastfield College.
Monday, October 6, 2014
 |
| Photo: Ayumi Horie |
Project 2: Coil built two or more heads inspiration
 |
| Sergei Isupov |
 |
| Akio Takamori- Self Portrait guard dogs |
 |
| I lost the name of this artist... let me know if you know who she is. |
Thursday, October 2, 2014
Cups cups and more cups! Charlie Cummings Gallery
 |
| http://claylink.com/zen/index.php?main_page=index&cPath=83_239 |
Wednesday, October 1, 2014
Project 2 Pinterest page
 |
Debra Fritts AFTER THE DANCE |
http://www.pinterest.com/meehanmargaret/project-2-self-portrait-bust/
12 expert glazing tips from Ceramic Arts Daily
 I have to admit, glazing is not my favorite part of the ceramic process. It’s probably because of its potential to make or break a good pot (and believe me, I have “broken” quite a few with poor glaze application). I tend to be a bit of a sloppy glazer and I sometimes rush through it a little more quickly than I should. Denver, Colorado ceramic artist Annie Chrietzberg is the polar opposite of me in the glaze room: methodical and precise. I know my glazing outcomes could be greatly improved if I followed just a couple of Annie’s tips. So I am sharing them with the community in today’s post (an excerpt from our new free download How to Make Pottery: How to Learn Pottery Techniques and Enjoy Working with Clay). Hopefully you will benefit from Annie’s advice too! – Jennifer Harnetty, editor. |
|
| For
complex forms consisting of thrown and textured elements, I use a
combination of pouring, dipping and brushing to get the color where I
want it. Dipping is the easiest way to ensure an even application, and
pouring, with a little practice, is the next. Brushing takes more
practice, time and attention, and I only use it when the first two
methods are not options for a tricky place on a pot. The
two troublemakers involved with glaze application are water and
gravity. When a bisque pot becomes too saturated with water, it won’t
accept glaze correctly, so use the least amount of water possible when
glazing, including when you are making corrections. And as for gravity, I
doubt there’s anyone who hasn’t experienced the wayward drip of one
glaze marring the perfect application of the previous glaze. |
|
This article was excerpted from the Tips from the Pros department of a back issue of Pottery Making Illustrated. To see more of what Pottery Making Illustrated has to offer, check out the latest issue here. |
|
| 12 Tips for Glazing Success | |

Click images to enlarge!
 •
Remove all dust before glazing including bisque dust, studio dust and
even household or street dust. Use an air compressor for foolproof
results, but work outside or in a well-ventilated area away from your
primary workspace, as bisque dust is extremely abrasive to your lungs. •
Remove all dust before glazing including bisque dust, studio dust and
even household or street dust. Use an air compressor for foolproof
results, but work outside or in a well-ventilated area away from your
primary workspace, as bisque dust is extremely abrasive to your lungs. •
Use silicon carbide paper to remove any rough spots you missed before
bisque firing. Place your work on a piece of foam to prevent chipping.
After sanding, wipe with a damp sponge to remove all traces of sanding
dust. Use a damp sponge instead of rinsing, which should be kept to a
minimum. Wring the sponge thoroughly and rotate it so each area is only
used once. I tend to use half a dozen or so of those orange round
synthetic sponges during any given glazing session. •
Glazes must be well mixed. I use an electric drill with a Jiffy Mixer
attached. If there is dry glaze caked on the sides of the bucket, sieve
the glaze, then return it to a clean bucket. •
Glazes must be well mixed. I use an electric drill with a Jiffy Mixer
attached. If there is dry glaze caked on the sides of the bucket, sieve
the glaze, then return it to a clean bucket. •
Glaze all the interiors of your pots first by pouring the glaze in,
then rolling it around for complete coverage. For complex pieces
requiring a number of glazing steps, glaze the insides the day before to
give you a drier surface to work with, especially for brushing. •
Glaze all the interiors of your pots first by pouring the glaze in,
then rolling it around for complete coverage. For complex pieces
requiring a number of glazing steps, glaze the insides the day before to
give you a drier surface to work with, especially for brushing. •
When removing unwanted glaze, scrape off as much of it as you can with a
dental tool or a similar small metal scraper to keep a sharp line. A
damp sponge removes the remaining glaze with a few strokes, keeping
water usage to a minimum. •
When removing unwanted glaze, scrape off as much of it as you can with a
dental tool or a similar small metal scraper to keep a sharp line. A
damp sponge removes the remaining glaze with a few strokes, keeping
water usage to a minimum.• Use a stiff brush to help clean glaze drips out of texture.  •
For dipping glazes, select an appropriately sized container for the
work at hand. I have lots of different sizes of shallow bowls that are
perfect for dipping the sides of my pieces. Wide shallow bowls allow me
to see what I’m doing, so I even use them for smaller things that fit
into the glaze bucket. •
When you can’t dip or pour, it’s time for brushing. Watch your bisque
as you brush—glaze is shiny and wet when first applied, then becomes
matt as the bisque absorbs the water. If you recoat too soon over a damp
coat, you’ll move the foundation layer rather than imparting a second
coat. Consider gravity when brushing and hold the pot both to encourage
the glaze to go where you want it to and to keep it from running where
you don’t want it. •
If a drip flows onto a previously glazed surface, stop, set the pot
down and wait. Resist the urge to wipe the drip with a sponge. Let the
drip dry, then carefully scrape it off with a dental tool or metal rib.
Use a small compact brush to wipe away glaze in areas you can’t reach
with a sponge. •
If a drip flows onto a previously glazed surface, stop, set the pot
down and wait. Resist the urge to wipe the drip with a sponge. Let the
drip dry, then carefully scrape it off with a dental tool or metal rib.
Use a small compact brush to wipe away glaze in areas you can’t reach
with a sponge. •
Don’t brush glaze from the big glaze bucket. Pour a small amount into a
cup, then briskly stir it occasionally to ensure that it stays properly
mixed. Keep a large, damp sponge nearby to keep the brush handle clean.
Stray drips often start with a handle full of glaze. •
Don’t brush glaze from the big glaze bucket. Pour a small amount into a
cup, then briskly stir it occasionally to ensure that it stays properly
mixed. Keep a large, damp sponge nearby to keep the brush handle clean.
Stray drips often start with a handle full of glaze.• If you’re glazing pots that don’t have a defined foot, push them across a piece of 220-grit silicon carbide sandpaper. The sandpaper removes some of the glaze from the contact areas, indicating where you need to wipe off the remaining glaze. |

Subscribe to:
Posts (Atom)